
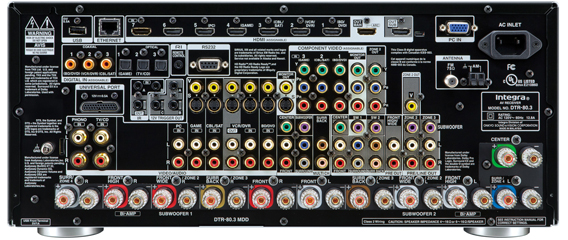
The home theater receiver is often the most powerful device in most people’s A/V equipment rack. It touches, in most cases, every aspect of the home theater experience: video, audio, and control. That being the case, setting up a receiver properly is critical to an enjoyable entertainment setup.
So how should you prepare for a new receiver, or get one up and running for the first time?
Let’s start with a pair of tips if you’re replacing an old receiver. First, before you pull all the wires out of your old hardware, LABEL EVERY CABLE AND WIRE. That can’t be stressed enough. You’ll save tons of headaches setting up the new unit if all your wires are clearly labeled. A piece of masking tape and a Sharpie are all you need. Or a nice Brother label maker works too.
Also, if you’re old receiver didn’t have HDMI (assuming your TV has HDMI–if not, you may want to consider a new TV too), you’ll want to rerun your video cables so that they terminate at the new receiver, allowing it to be the central switch for your system.
Once everything’s hooked up, the fun really starts. Virtually every new receiver has onscreen menu systems that make wading through layers of complicated options much easier (though to view these, your receiver will need to be hooked up to your display).
Options are endless in today’s receivers. We could get bogged down looking at everything they can do, but we’ll just focus on a few of the main areas: Speaker size/distance, crossover frequency, and video processing.
Once the unit is hooked up, most people will immediately balance the speakers to their listening position. But to get a true balance, you should check a few items off your list first, starting with speaker size. Speaker size doesn’t necessarily have to do with physical size of the speaker, though in many cases it does line up.
Speaker size more accurately refers to your speaker’s ability to reproduce low frequencies. Speakers that have very small woofers should be set to “small”. Those with large or multiple woofers that are able to reproduce lower-range frequencies may be set to “large”. This setting is part of what helps control how your receiver decides what sounds go to your speakers, and what goes to your subwoofer.
The other part of that equation is the crossover frequency. This setting determines at what point your system will route low-frequency audio information to your subwoofer. This is especially important if your speakers are set to “small.”
Before guessing at this number, check the specs for your speakers, as most manufacturers will include the data you need, listed as frequency response range or crossover frequencies. If you don’t have that information, start at 80Hz and work from there. Smaller speakers will likely need to be set in the 120-140Hz range, while large, floor standing speakers could go into the 40Hz range.
Improperly set speaker size and crossover frequency will result in a serious lack of LFE in bass-heavy films and music. If you’re new system lacks a punchy bass, this is likely the culprit.
Speaker size and crossover frequency are two of the most confusing aspects of the setup process. With those out of the way, your next step should be speaker distance. Unlike speaker size, which is somewhat mislabeled, speaker distance is just what it sounds like. This is how far your speaker is from your main listening position.
Many units will come with a microphone that will set the distance for you based on a series of test tones. However, that measurement isn’t always accurate. We recommend you use a tape measure and jot down the actual distance, and if your automated setup doesn’t get it right, adjust the distances accordingly.
Setting the correct distance is crucial to creating an accurate sound field for surround tracks, along with ensuring the speaker levels are properly set.
When it comes to speaker levels, the automated setups are generally much more accurate with speaker levels than distances, so you shouldn’t have to mess with these much. Don’t gloss over this step, however, because incorrectly set levels can lead to a sound field that is too strong in one area. The lesson? Automated setups are a huge help, but you should always double-check the results.
Finally, as we suggested with our article on setting up your new HDTV, start with all the video processing options in your receiver set to off or minimal. You can always go back and slowly adjust these later, but the less processing that’s done with a source image, the better. After some trial and error, you may find your receiver does a better job than your display. If you are replacing an old receiver, you’ll want to re-calibrate your display for the new unit.
Today’s receivers are one of the most complex part of a home theater setup, and this article just touches on a few of the options. But starting by getting these settings right will get you on the way to enjoying the best sound possible.

Source: HDLiving.com